Art resin, a versatile medium, combines epoxy resin and hardener in precise ratios. It’s widely used in art, crafts, and DIY projects for its durability and creative possibilities.
What is Art Resin?
Art resin is a two-part compound made from epoxy resin and hardener. When mixed, they undergo a chemical reaction, curing into a durable, glossy finish. It’s solvent-free, UV-resistant, and food-safe, making it ideal for artistic projects. The 1:1 mixing ratio simplifies use, while its clear finish enhances visual appeal. Perfect for coatings, embeddings, and creating dimensional effects, art resin is a versatile medium for crafters and artists seeking professional results.
Common Uses of Art Resin in Creative Projects
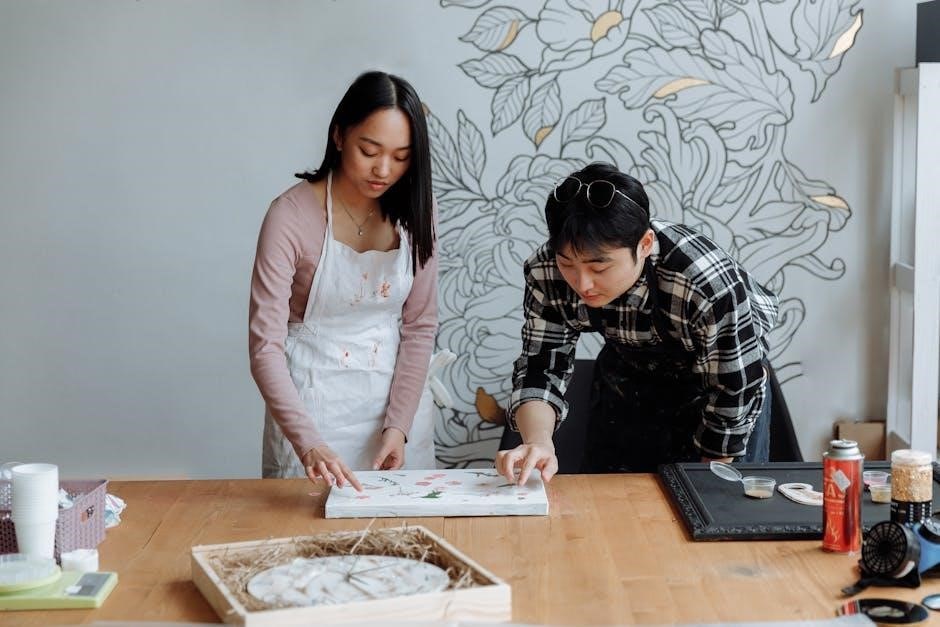
Art resin is widely used in various creative projects, including jewelry-making, coating artworks, and embedding objects like glitter, flowers, or insects. It’s also popular for creating decorative table tops, river tables, and realistic food replicas. Many artists use it to add protective layers to paintings or mixed-media pieces. The resin’s clear finish and durability make it ideal for enhancing visual appeal while preserving the integrity of the artwork or creation.

Preparing Your Workspace
Set up a clean, well-ventilated area with a disposable surface. Gather tools like stir sticks, measuring cups, and protective gear for a safe and organized workspace.
Gathering Necessary Tools and Materials
To work with art resin, you’ll need measuring cups, stir sticks, protective gloves, goggles, and a well-ventilated workspace. Ensure you have molds or a surface prepared for pouring. Gather pigments, glitters, or other materials to add unique effects. Keep paper towels and cleaning supplies handy for spills. A heat gun or torch can help remove bubbles. Organize all tools and materials beforehand to ensure a smooth, efficient process and safe creative experience.
Setting Up a Safe and Clean Work Area
Ensure proper ventilation by working in a well-ventilated space or using a fan. Wear protective gloves and goggles to prevent skin and eye irritation. Cover your work surface with plastic sheets or drop cloths to protect it from spills. Organize tools and materials within easy reach to maintain a clutter-free environment. Keep cleaning supplies, like paper towels and isopropyl alcohol, nearby for quick spill cleanup. A clean, organized workspace enhances safety and creativity while working with art resin.
Mixing Resin and Hardener
Mixing resin and hardener is crucial for proper curing. Always combine them in the correct ratio, as specified by the product instructions, to ensure a flawless finish;
Understanding the Resin-to-Hardener Ratio
The resin-to-hardener ratio is essential for successful projects. Typically, a 1:1 ratio is standard, but check the product instructions for specific guidelines. Accurate mixing ensures proper curing and durability. Incorrect ratios can lead to soft spots or incomplete hardening. Use a measuring cup or scale for precision, especially when working with large quantities. Always follow the manufacturer’s recommendations to achieve optimal results and avoid common mistakes. Proper measurement is key for a professional finish.
Steps for Proper Mixing to Avoid Bubbles
Start by combining resin and hardener in the correct ratio. Stir slowly and thoroughly for 3-5 minutes to ensure a proper bond. Avoid vigorous mixing, as it introduces air bubbles. Use a stir stick or paddle, working in a figure-eight pattern. Scrape the sides and bottom of the container to incorporate all material; For persistent bubbles, gently tap the container or use a heat gun on a low setting. Proper mixing prevents defects and ensures a smooth finish.
Adding Elements to the Resin
Add pigments, glitters, or other materials to the mixed resin for unique effects. Stir gently to avoid bubbles. Experiment with colors and textures for creative designs.
Incorporating Pigments, Glitters, and Other Materials
Pigments, glitters, and other materials can enhance resin art. Add pigments or dyes for vibrant colors, and mix in glitters or powders for texture. Incorporate natural elements like leaves or flowers for unique designs. Gently stir to distribute evenly. Avoid overloading the resin, as it may compromise curing. Experiment with different materials to achieve personalized effects and make each piece truly original and visually striking.
Techniques for Creating Unique Effects
Explore various techniques to achieve distinctive resin effects. Try layering for depth, using molds for intricate shapes, or incorporating heat tools to create ripples. Swirling colors or adding metallic powders can produce stunning visual interest. Experiment with timed pours for marbling or gradient effects. Each technique offers endless creativity, allowing artists to craft truly one-of-a-kind pieces that showcase their unique style and artistic vision. Practice and innovation lead to extraordinary results in resin art.
Applying the Resin Mixture
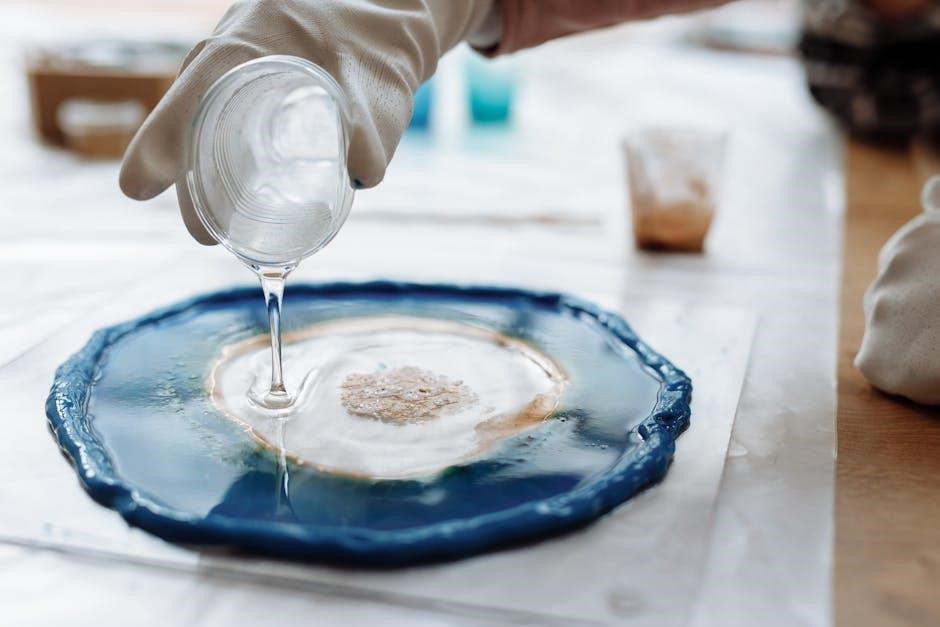
Pour the mixed resin into molds or onto surfaces, spreading evenly. Use tools to achieve desired finishes, ensuring a smooth application for professional-looking results every time.
Pouring Resin into Molds or Onto a Surface
Begin by ensuring your mold or surface is clean and prepared. Mix the resin and hardener in the correct ratio, stirring thoroughly to avoid bubbles. Pour the mixture slowly into the mold or across the surface, spreading it evenly with a tool like a credit card or brush. Work methodically to cover the entire area, ensuring a smooth flow. For intricate molds, tilt gently to guide the resin into corners. Avoid over-pouring to prevent spills and unevenness. If bubbles form, use a torch or heat gun to carefully pop them. Allow the resin to settle before proceeding to the next step.
Spreading and Leveling the Resin for a Smooth Finish
Once poured, use a brush, squeegee, or credit card to spread the resin evenly across the surface or mold. Tilt the surface gently to guide the resin into corners and edges. For bubbles, lightly pass a torch or heat gun over the area. Allow the resin to settle and level naturally to avoid introducing new bubbles. Work quickly, as the resin will begin curing soon. Use a level tool to ensure an even finish, and avoid over-manipulating the resin to prevent unevenness.
Curing and Drying
Curing occurs as resin and hardener chemically react, hardening the mixture. Most resins cure fully within 24 hours, depending on temperature and thickness. Warmer environments speed up the process.
Understanding the Curing Process
The curing process begins immediately after mixing resin and hardener. It involves a chemical reaction that transforms the liquid mixture into a solid state. This process typically takes 24 hours to complete, depending on environmental factors like temperature and humidity. Warmer conditions accelerate curing, while cooler temperatures slow it down. It’s crucial to ensure the mixture is free from contaminants and applied evenly for a smooth finish. Proper curing ensures durability and a professional result in art resin projects.
Factors Affecting Drying Time and Finish
Temperature and humidity significantly influence the drying time and finish of art resin. Higher temperatures speed up the curing process, while lower temperatures slow it down. Additionally, humidity can affect the surface finish, potentially causing cloudiness or unevenness. Proper ventilation also plays a role, as adequate airflow ensures a smooth and even cure. Ensuring the workspace is at an optimal temperature and humidity level is essential for achieving a professional, glossy finish in resin projects.
Tips for Beginners
Start with small projects to practice mixing and pouring techniques. Invest in quality tools and follow safety guidelines to ensure successful resin art experiences.
Common Mistakes to Avoid
One of the most common mistakes is using inaccurate resin-to-hardener ratios, which can prevent proper curing. Stirring too quickly introduces air bubbles, ruining the finish. Working in direct sunlight or high humidity can cause the resin to set too quickly or unevenly. Forgetting to measure ingredients accurately leads to failed projects. Using unprepared or dirty molds results in a poor finish. Allowing dust or debris to settle on wet resin creates imperfections. Avoid overfilling molds, as it can cause spills and waste. Not sealing porous surfaces beforehand leads to adhesion issues. Lastly, rushing the curing process instead of letting it set naturally can weaken the final result.
Best Practices for Achieving Professional Results
For professional results with art resin, ensure precise measurements of resin and hardener, following the manufacturer’s ratio. Use high-quality materials and tools to avoid imperfections. Work in a well-ventilated, dust-free area to prevent contaminants. Stir thoroughly but slowly to minimize bubbles. Apply thin, even layers, allowing each to cure slightly before adding more. Use a heat gun gently to remove bubbles without creating air pockets. Avoid overworking the resin once poured, as it can introduce defects. Allow the resin to cure undisturbed for the recommended time, ensuring a smooth, glossy finish. Regularly clean tools with isopropyl alcohol to maintain their effectiveness. Experiment on small projects to refine techniques before tackling larger ones. Keep detailed notes for consistency and future reference.
Safety Precautions
Wear gloves, goggles, and work in a well-ventilated area to avoid inhaling fumes. Use protective gear and ensure proper ventilation to handle spills safely and prevent accidents.
Protective Gear and Ventilation
Always wear protective gloves, goggles, and a mask when working with art resin to prevent skin irritation and exposure to harmful fumes. Ensure good ventilation by working in a well-ventilated area or using a fan to dissipate fumes. Avoid breathing in resin vapors, as they can be hazardous to your health. Proper ventilation not only enhances safety but also helps prevent the buildup of flammable vapors. Keep your workspace away from open flames or sparks to minimize fire risks. Prioritize safety to enjoy a secure and creative experience with art resin.
Handling Spills and Cleaning Up
Act quickly to contain spills by using sand or absorbent materials to prevent spreading. Clean up immediately with a solvent like acetone or mineral spirits before the resin hardens. Dispose of rags and materials properly, as they may be flammable. For fresh spills, blot gently with paper towels. Avoid using water, as it can create a sticky mess. Always prioritize safety and cleanliness to maintain a controlled workspace and prevent accidents when working with art resin.
Advanced Techniques
Explore layering, multi-pour methods, and texture creation for intricate designs. Techniques include adding pigments, glitters, or materials for unique effects, enhancing your resin art projects creatively.
Layering and Multi-Pour Methods
Layering and multi-pour techniques allow artists to create intricate, multi-dimensional designs. By pouring resin in stages, you can build depth and texture. Start with a base layer, let it cure, then add subsequent layers, experimenting with colors or materials. For multi-pour effects, divide resin into smaller batches, mix with pigments, and pour in sequence. This method minimizes bubbles and ensures even curing. Proper timing between layers is crucial for a seamless finish. Practice on small projects to master control and flow.
Creating Textures and Dimensional Effects
Textures and dimensional effects can be achieved by incorporating materials like glitters, powders, or heavy pigments into the resin. Use tools or brushes to manipulate the resin while it’s wet, creating patterns or swirls. For added depth, embed objects like beads, fibers, or even found items. Drizzling resin in layers or using a textured mold can also enhance dimensionality. Experiment with timing and material placement to avoid sinks or bubbles, ensuring a professional finish with unique visual appeal.
Mastering art resin opens a world of creative possibilities. With practice and patience, you can achieve stunning results and bring your artistic vision to life beautifully.
Final Tips for Mastering Art Resin
Start with small projects to build confidence and refine techniques. Always prepare your workspace thoroughly to avoid setbacks. Use a torch or heat gun to remove bubbles for a smooth finish. Experiment with layering and pigments to create unique effects. Practice patience, as curing times vary. Keep a clean workspace and store materials properly. Finally, embrace creativity and enjoy the journey of mastering this versatile medium.
Encouragement to Experiment and Create
Embrace creativity and explore artistic freedom with art resin. Don’t fear mistakes—they often lead to unique designs. Try new techniques, mix colors, and add materials to discover fresh styles. Share your work online for inspiration and feedback. Remember, practice builds skill, so keep experimenting. Most importantly, enjoy the process and celebrate your artistic journey, turning ideas into beautiful, lasting creations.