
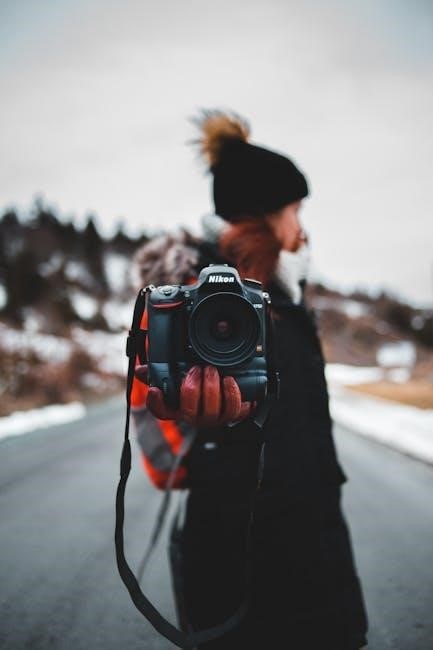
The Nikon D3300 is a versatile entry-level DSLR camera designed for beginners and hobbyists, offering a 24.2MP sensor, EXPEED 4 processor, and intuitive Guide Mode.
1.1 Key Features of the Nikon D3300
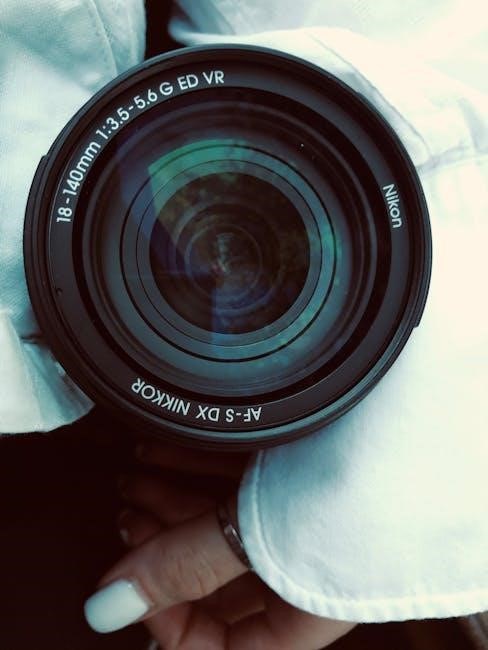
The Nikon D3300 features a 24.2-megapixel CMOS sensor, EXPEED 4 image processor, and 11-point autofocus system. It captures full HD 1080p video and includes an 18-55mm VR II kit lens. The camera offers Guide Mode for easy operation and various in-camera editing options for enhancing photos. With ISO sensitivity up to 12,800, a 3-inch LCD screen, and continuous shooting at 5 fps, the Nikon D3300 is versatile for various photography needs, supporting SD, SDHC, and SDXC cards for ample storage.
1.2 Why Choose the Nikon D3300?
The Nikon D3300 is an excellent choice for beginners and hobbyists, offering a perfect blend of performance, ease of use, and affordability. Its 24.2MP sensor and EXPEED 4 processor deliver high-quality images, while Guide Mode simplifies camera operation. Lightweight and user-friendly, the D3300 is ideal for capturing life’s moments with creative control, making it a great starting point for photography enthusiasts seeking value and versatility.

Camera Layout and Controls
The Nikon D3300 features an intuitive layout with essential controls, including the mode dial, navigation buttons, and info button, designed for easy access to camera settings.
2.1 External Controls and Their Functions
The Nikon D3300 features a range of external controls designed for easy operation. The mode dial allows quick access to shooting modes, while the shutter release button captures images. The multi-selector navigates menus, and the info button displays camera settings. Additional controls include the memory card slot for storage and the menu button for accessing advanced options, ensuring intuitive functionality for photographers of all levels.
2.2 Understanding the Mode Dial
The mode dial on the Nikon D3300 simplifies shooting by offering preset options. Auto Mode adjusts settings automatically, while Scene Modes optimize for specific situations like portraits or landscapes. Manual Mode offers full control, and Aperture Priority or Shutter Priority Modes allow partial manual adjustments. Custom modes save personalized settings, providing flexibility for diverse photography needs and skill levels.
Getting Started with the Nikon D3300
Unbox and set up your camera, charge the battery, and insert the memory card. Attach the lens, adjust basic settings like date and time, and you’re ready to shoot.
3.1 Unboxing and Initial Setup
Carefully unbox your Nikon D3300, ensuring all accessories like the lens, battery, charger, and strap are included. Begin by charging the battery fully before first use. Insert the memory card into the slot, ensuring it clicks securely. Attach the provided lens by aligning the mount and twisting gently. Finally, set the camera’s language, date, and time in the menu system to complete the initial setup.
3.2 Charging the Battery and Inserting the Memory Card
Connect the battery to the provided charger and plug it into a power source. Allow it to charge fully, indicated by a green light. Locate the memory card slot on the camera’s side. Insert the card with the label facing the camera, ensuring it clicks into place. This prepares your Nikon D3300 for capturing high-quality images and videos effortlessly.
3.3 Attaching the Lens and Strap
Mount the lens by aligning the white dots on the lens and camera, then twist gently until it clicks. Secure the strap by threading it through the camera’s eyelets and tightening for a comfortable fit. Ensure the lens is properly seated to avoid damage and the strap is snug for safe handling. This setup ensures your Nikon D3300 is ready for use and protected during shooting sessions.
Shooting Modes Explained
Shooting modes offer flexibility and control, allowing you to capture photos according to your creative vision and shooting conditions. The Nikon D3300 features various modes, from fully automatic to manual, catering to both beginners and advanced photographers.
4.1 Auto and Scene Modes
The Nikon D3300 offers Auto and Scene modes for effortless photography. Auto mode simplifies shooting, while Scene modes like Portrait, Landscape, and Night Portrait optimize settings for specific conditions. These modes allow beginners to achieve professional-looking results without manual adjustments. Use the mode dial to select options like Auto, Portrait, Landscape, Close-up, or Night Portrait for tailored image capture. Guide Mode also assists with tips and adjustments for better photos.
4.2 Manual, Aperture Priority, and Shutter Priority Modes
Manual (M) mode offers full control over aperture and shutter speed. Aperture Priority (A/Av) lets you set the aperture, while the camera adjusts the shutter speed. Shutter Priority (S/Tv) allows you to set the shutter speed, with the camera adjusting the aperture. These modes provide creative flexibility for advanced photographers, enabling precise control over exposure and artistic expression in various lighting conditions and compositional needs.
Focusing and Metering
The Nikon D3300 features advanced autofocus and manual focus options, ensuring sharp images. Metering modes include Matrix, Center-Weighted, and Spot, providing precise exposure control in various lighting conditions.
5.1 Understanding Autofocus Modes
The Nikon D3300 offers versatile autofocus options for precise control. AF-A mode automatically selects between Single AF and Continuous AF. Single AF (AF-S) locks focus on stationary subjects, while Continuous AF (AF-C) tracks moving subjects. The camera also features predictive focus tracking for dynamic shots. Users can choose from multiple autofocus area modes, including Single-Point, Dynamic, 3D Tracking, and Auto. This ensures sharp images in various shooting conditions, enhancing overall focus accuracy and flexibility.
5.2 Using Manual Focus Effectively
Manual focus on the Nikon D3300 allows precise control, ideal for macro, portrait, or low-light photography. Rotate the lens focus ring to adjust sharpness. Use the electronic rangefinder in the viewfinder for confirmation. Enable focus peaking in Live View for highlighted in-focus areas. This method ensures creative control and accuracy, especially when autofocus struggles to lock on. It’s a skill that enhances flexibility and image quality.
Image Quality and Settings
Image quality is influenced by resolution, compression, and file format. The D3300 offers options to adjust image size, compression, and RAW/JPEG settings for optimal results and storage efficiency.
6.1 RAW vs. JPEG: Which to Choose
RAW files store all image data, offering greater flexibility in post-processing, while JPEG files are compressed and ready for sharing. The D3300 allows simultaneous RAW+JPEG capture, giving photographers flexibility in editing and convenience for immediate use. RAW is ideal for professional editing, whereas JPEG suits everyday shooting and quick sharing needs.
6.2 Adjusting Image Size and Compression
Adjusting image size and compression on the Nikon D3300 allows photographers to optimize file settings. Image size options include Large (24M), Medium (12M), and Small (6M), while compression settings range from Fine to Basic, balancing file size and image quality. This feature helps manage storage and ensures desired output without compromising visual integrity.
ISO Sensitivity and Noise Reduction
ISO sensitivity adjusts the camera’s light capture, ranging from 100 to 12,800. Higher ISOs enhance low-light performance but may introduce noise. The Nikon D3300 includes noise reduction features to minimize grain, ensuring clearer images in challenging lighting conditions.
7.1 Understanding ISO and Its Impact on Photos
ISO sensitivity determines the camera’s light sensitivity, affecting image brightness. Lower ISOs (100-400) are ideal for bright conditions, producing sharp images. Higher ISOs (6400-12,800) capture images in low light but may introduce noise. The Nikon D3300’s ISO range (100-12,800) balances flexibility and quality, while noise reduction features help minimize grain in low-light photos.
7.2 Managing Noise in Low-Light Conditions
In low-light conditions, the Nikon D3300 may produce noise, especially at higher ISOs. To minimize this, use the Long Exposure Noise Reduction feature, which reduces grain in long exposures. Additionally, using external Speedlights or adjusting settings like Active D-Lighting can enhance image quality. Post-processing tools in the camera or external software can further refine and reduce noise for cleaner results.

White Balance and Picture Controls
White balance ensures accurate colors under various lighting, while Picture Controls customize image style, contrast, and sharpness, allowing personalization to achieve desired visual effects in photos.
8.1 Setting White Balance for Accurate Colors
White balance adjusts color tones to match lighting conditions, ensuring accurate hues. The D3300 offers presets like Auto, Daylight, and Cloudy, plus custom options for precise control. Access white balance in the Shooting Menu, select the desired setting, and preview changes in Live View for optimal results. This feature enhances color accuracy, reducing unwanted casts in photos.
8.2 Customizing Picture Controls
Picture Controls allow users to customize image settings like sharpening, contrast, and saturation. Access via the Shooting Menu, these profiles (Standard, Neutral, Vivid, Monochrome, etc.) can be adjusted to suit preferences. Tweaking parameters enhances creativity, enabling unique styles. Custom Picture Controls can also be saved for quick access, ensuring consistent results across shoots and personalizing your photography experience effectively.
Flash and External Lighting
The Nikon D3300 features a built-in flash for added illumination and supports external Speedlights, enhancing photography in low-light conditions and offering creative lighting control.
9.1 Using the Built-in Flash
The Nikon D3300’s built-in flash is easily accessible and provides additional light in low-light conditions. To enable it, press the flash button or navigate through the menu. The flash automatically pops up in Auto and Scene modes when needed. For better results, adjust flash settings in the menu, such as flash compensation, to balance lighting and achieve natural-looking photos.
9.2 Working with External Speedlights
External Speedlights enhance the Nikon D3300’s flash capabilities, offering more power and flexibility. They can be attached via the hot shoe or wirelessly triggered for off-camera lighting. Compatible with Nikon’s Creative Lighting System, external Speedlights allow advanced techniques like bounce flash and multiple light setups. Adjust settings through the camera menu to achieve balanced lighting and professional results in various shooting scenarios.
Viewfinder and Live View
The Nikon D3300 features an optical viewfinder for precise composition and a Live View mode for previewing shots on the LCD screen, aiding framing and focusing.
10.1 Using the Optical Viewfinder
The optical viewfinder provides a clear, real-time preview of your scene, essential for precise composition. It displays key shooting information like aperture, shutter speed, and ISO. Use the diopter adjustment to customize focus for your eyesight. The viewfinder also helps in stabilizing the camera, reducing handshake and ensuring sharper images, especially in low-light conditions. This feature is indispensable for professional and casual photographers alike, offering a traditional shooting experience.
10.2 Navigating Live View and Its Features
Activate Live View via the Lv button for real-time preview on the 3-inch LCD screen. This mode is ideal for precise framing, especially in unique shooting angles. Use touch operations to focus and shoot. The screen displays shooting info, grid lines, and histograms. Live View enhances creativity in both stills and video, allowing you to preview effects and adjustments before capturing the perfect shot.
Playback and Editing on the Camera
Review captured images on the LCD screen, delete unwanted photos, and apply basic edits like resizing or setting copyright info directly on the camera.
11.1 Reviewing and Deleting Photos
To review photos, press the Playback button. Use the left and right arrows to navigate through images. For deleting, select the trash can icon in the Playback menu. Choose individual or multiple photos for deletion. Confirm to remove unwanted images permanently. This feature helps manage storage efficiently and keeps your library organized. Use with care to avoid accidental deletions.
11.2 Basic In-Camera Editing Options
The Nikon D3300 offers basic editing options like adjusting exposure, white balance, and color saturation. Users can crop images, apply filters, or convert RAW files to JPEG. These tools allow quick adjustments without a computer. Access the retouch menu via the Playback button for creative tweaks, ensuring your photos look polished before sharing. This feature enhances workflow efficiency and saves time for photographers on the go.
Troubleshooting Common Issues
Consult the troubleshooting section in the manual for solutions to error messages, camera malfunctions, or unexpected behavior. Solutions for common issues like sensor cleaning or menu navigation are provided.
12.1 Resolving Error Messages
If error messages appear in the viewfinder or monitor, refer to the troubleshooting section in the manual. Solutions for issues like “CARD NOT FORMATTED” or sensor cleaning are provided. For detailed guidance, download the Nikon Manual Viewer 2 app or consult the PDF manual. Ensure to update firmware and reset settings if needed for optimal performance.
12.2 Addressing Common Camera Malfunctions
Common malfunctions like shutter issues or unresponsive buttons can often be resolved by resetting settings or cleaning the camera. Refer to the troubleshooting guide in the manual for specific solutions. For persistent problems, update the firmware or contact Nikon support. Always ensure the camera is properly maintained to prevent operational disruptions during photography sessions.